From Scratch to Chat: How I Built My First AI Chatbot Using Voiceflow and Make.com

Image created in Ideogram
Why Build a Chatbot?
One of the main reasons I decided to dive into AI automation was to create no-code AI tools that solve business problems. Chatbots felt like the perfect starting point.
According to Consumer Reports, 35% of people use chatbots to fix problems or get detailed answers. So, what better way to start my AI journey than by building something practical and valuable for businesses? Chatbots are already doing the heavy lifting for companies — handling customer inquiries, booking appointments, and generating leads. These tasks are essential for businesses that want to run efficiently and improve customer engagement.
With that in mind, I created an automation agency called Quiet Storm AI. Some of the services I’ll be offering include Conversational AI solutions and Lead Gen Bots to help businesses streamline their processes and engage with their customers more effectively. But before offering those services to clients, I first needed to learn how to build my own chatbot for Quiet Storm that can interact with visitors, answer their questions, and even schedule consultations — all without manual intervention.

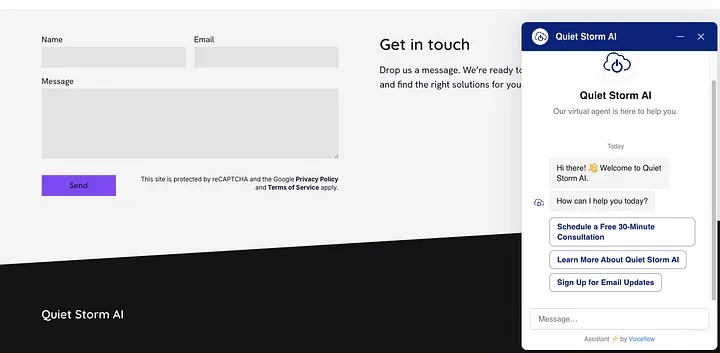
The Quiet Storm AI chatbot
Focusing on chatbots as a starting point allows me to gain essential knowledge in natural language processing (NLP), user interactions, and basic automation. These are the building blocks of more sophisticated AI. Once I’m confident in these areas, I’ll be ready to move on to more advanced AI builds.
Getting Started with Voiceflow
With a clear goal in mind, the next step was finding the right platform to bring it to life. After researching several options, I decided to go with Voiceflow. It’s a user-friendly platform that allows you to visually design conversational AI experiences. For someone like me, who isn’t a coder, it removes the technical barriers. Instead of diving into complex code, you can map out the logic of your chatbot through an intuitive, visual interface.
The process of building a conversation flow
I started by building out the basic flow of my chatbot’s conversation. This included a welcome message, a main menu, and setting up options like “Book a Call”, “Learn About Our Services”, and “Sign Up for Email Updates”. Here’s how I went about it:
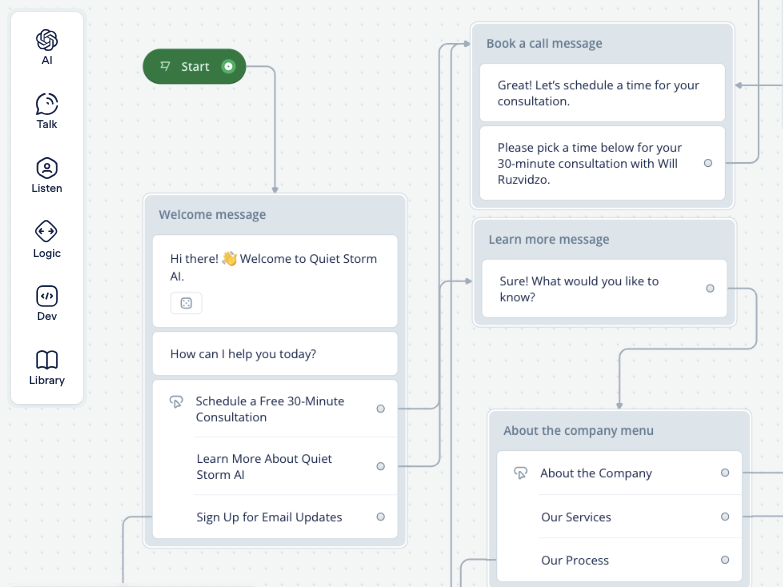
1. Welcome Message: A simple, friendly greeting is key to engaging users right away. My bot’s first message is:
“Hey there! 👋 Welcome to Quiet Storm AI. I’m Sharon, your customer support agent. How can I help you today?”
2. Setting Up Options with Choice Blocks: The Choice Block in Voiceflow is the foundation of your bot’s interactivity. For each option (like Book a Call), I created a corresponding arrow that directed the conversation to a specific path. This way, if a user clicked on “Learn More About Our Services”, the chatbot would start explaining the services on offer.

My chatbot conversation flow
3. Creating Conversation Flow: For each option, I added Text Blocks to continue the conversation. For instance, selecting “Book a Call” would lead the bot to add responses like, “Great! Please pick a time below for your 30-minute consultation with Will Ruzvidzo”. Or, “Is there anything else I can assist you with today?”
4. Refining the Flow: To keep the conversation natural, I added delays between text blocks. For example, a slight pause before the chatbot responds can make the interaction feel more human and less like a machine firing rapid responses.
Integrating Automation with Make.com
Voiceflow was great for building the conversational side of the chatbot, but I needed a way to automate the workflow. This is where Make.com excels. It connects your chatbot to other tools like Google Sheets, email platforms, and CRMs. It also lets you create scenarios that trigger automated actions based on specific events. It’s basically like Zapier on Steroids.
Setting Up My Make.com Account
The first step was to create a Make.com account and build a “scenario.” This is an automated workflow that is triggered by an event — like a new lead entering their email through the chatbot.
Here’s how I integrated Make.com with Voiceflow:
1. Creating a Webhook for Data Transfer: A webhook is essentially a way for one app to send real-time data to another app. In this case, it allowed the chatbot to send any data collected (like an email address) directly to the webhook in real-time.

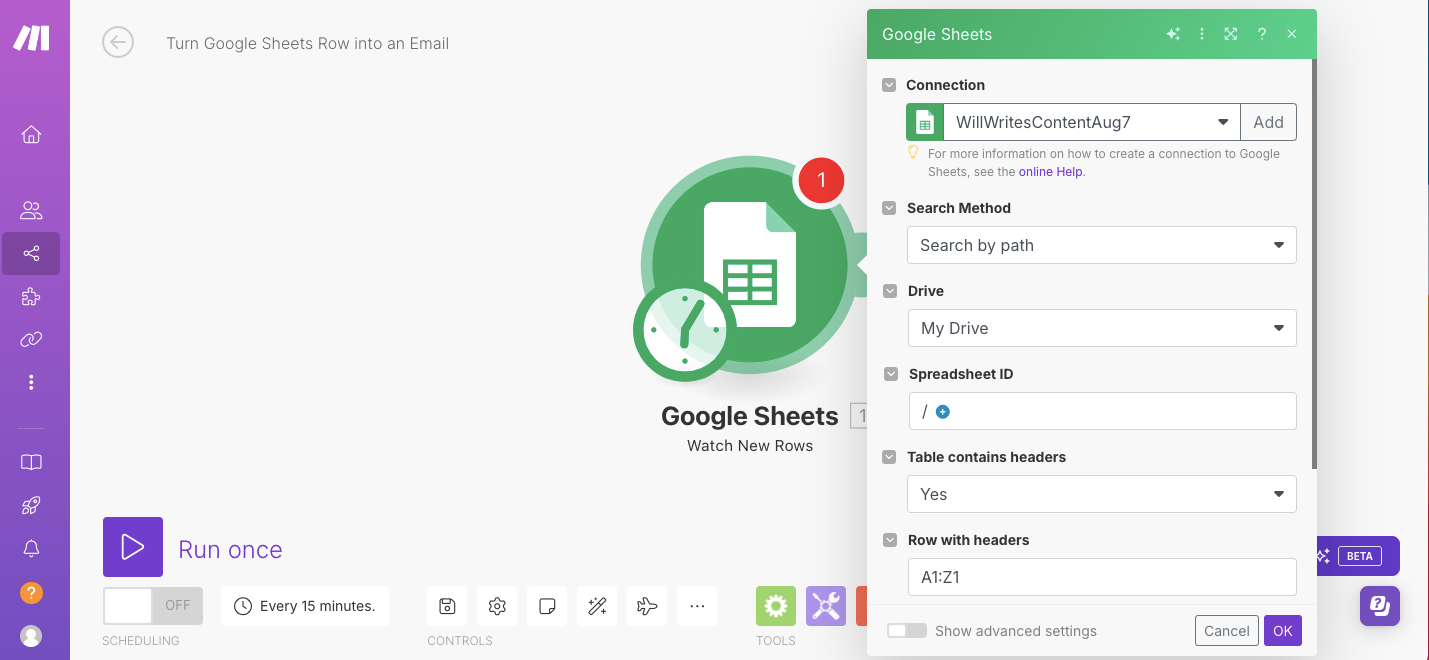
2. Sending Data to Google Sheets: Once the webhook was in place, I created a scenario in Make.com to send the lead data to a Google Spreadsheet. This way, every time a new lead was captured by the chatbot, their information would automatically appear in my spreadsheet, ready for follow-up.
3. Automating Follow-Up Actions: To make the process even smoother, I set up additional automation for sending a confirmation email to the lead. This ensured that the user was acknowledged immediately after interacting with the chatbot.
Visit the Quiet Storm website to see the bot in action. I’d also love to hear your feedback!
Post a comment